
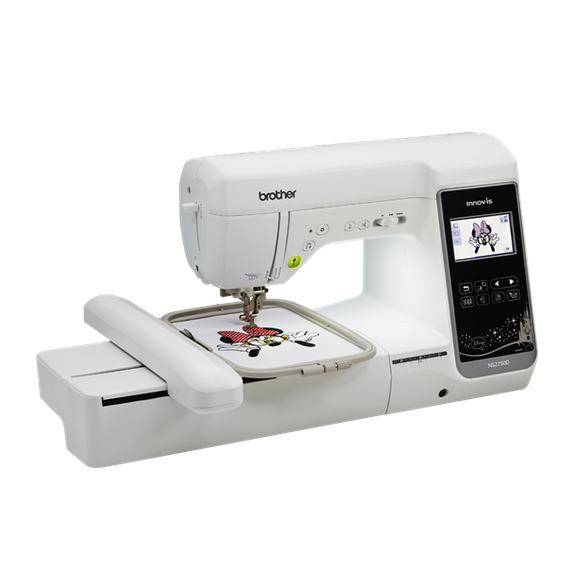
The Brother NS2750D is a combination sewing and embroidery machine that allows you to stitch designs onto fabric. The machine comes with 138 embroidery designs and 240 built-in stitches with a 5-by-7-inch maximum embroidery area. The machine includes on-screen editing, including letter editing and combining designs. The library also offers access to Hatch Embroidery Software, where you can digitize and design your own embroidery files.
What does the Makerplace provide?
- Brother NS2750D embroidery machine
- Built in designs include lettering for monograms, frames and outlines, florals, and Disney characters.
- Machine embroidery hoops (1x2.5", 4x4", and 5x7")
- Embroidery thread. See our price list for more details.
- Various stabilizers for different fabrics. See our price list for more details.
- Hatch Embroidery Composer 2 software for digitizing existing artwork.
What do I need?
Customers will need to bring their own fabric or materials to embroider on. You will need a design file, which you can create on the machine or bring in your own file. All design files must be a .PES file.
How do I use it?
Embroidery
-
Insert your fabric into the embroidery hoop. Make sure to use the proper stabilizers in your hoop as well. The Makerplace has various stabilizers for purchase. See our price list for more details.
-
Attach the embroidery frame to the machine. Raise the presser foot and while lightly holding the lever on the frame holder to the left, align the two pins on the embroidery frame holder with the mounting brackets on the frame. Then press the frame holder with the mounting brackets until a click is heard.
-
Plug in the embroidery machine and turn it on. Select which pattern category you would like to use in the pattern type selection screen. Press the left and right arrow buttons to display the desired pattern on the screen.
-
Select your design and then check to make sure the pattern is in the right position so that it will be sewn in the right place. The embroidery hoop will move to show where the pattern will be sewn.
-
The display screen will show you what thread colors are needed for the pattern. Thread the machine with the first color, then lower the presser foot. Press the Start/Stop button to begin embroidery.
-
After five or six stitches, hit the Start/Stop button again to trim the thread. Press the button again to resume embroidering. Let the machine finish embroidery the first color.
-
Repeat steps five and six for the remaining colors in the pattern.
-
Remove the hoop from the machine and carefully remove the excess stabilizer from the fabric.
Sewing
- Plug in the embroidery machine and turn it on.
- Thread the needle and bobbin according to the instructions on the machine.
- Choose your stitch type using the arrow buttons on the display screen.
- Set the fabric under the presser foot and lower the presser foot.
- Adjust the sewing speed with the speed controller.
- Press the Start/Stop button to start sewing or use the foot controller to sew.
- Press the Thread Cutter button to trim the upper and lower threads.
What materials can I use?
- Fabric (Cotton, fleece, canvas, etc.)
- Sweatshirts, T-shirts, baby clothes, bags, blankets, hats
This equipment is available to use free of charge. Materials are available for purchase to assist in using this equipment. See all materials and prices here. You may also bring your own materials (all outside materials must be approved by Makerplace staff before use).
Makerplace Essentials Online Training
More Resources
- Brother NS2750D Sewing and Embroidery Machine Instruction Manual
- Quick Reference Guide
- Disney Design Guide
- Embroidery Design Guide
Tips and tricks
Make sure that you only have one layer of fabric in the working area. This may mean you need to turn your clothing items inside out in order to fit well.
Use the Hatch Embroidery Software on our Design Computers to make your own designs. Learn how to digitize artwork into embroidery files here.